
Food Hacks
Maximize Your Citrus

-
To easily extract more juice from lemons and limes, try microwaving them before juicing. Start by selecting firm and heavy fruits, which indicate a higher juice content, and wash them thoroughly to remove any surface residue. Place the whole fruits on a microwave-safe plate and heat them on high power for about 20 to 30 seconds, adjusting the time if you're working with multiple fruits. After microwaving, let the fruits cool for a minute to allow the heat to further soften the inner membranes. This simple warming step breaks down the membranes that hold the juice, making it easier to extract when you squeeze or press the fruit. Whether you're making lemonade or need fresh lime juice for a marinade, this method ensures you get every last drop with minimal effort.
How to reuse "Bad" Wine

-
Stumbling upon a bottle of wine that's been open a tad too long is a familiar kitchen quandary. Rather than pouring it down the sink, this kitchen hack breathes new life into stale wine, turning it into a treasured component of your culinary creations. You can not only reduce waste but also add a layer of flavor to your cooking that water or stock alone cannot achieve. So, embrace the potential of "bad" wine and let it work its magic in your next culinary creation.
Firstly, it's important to differentiate between wine that's "bad" due to being corked or having turned into vinegar, and wine that's simply lost its prime flavor for drinking. The latter is our focus here – wine that's not spoiled but isn't pleasant to drink can still be a valuable asset in cooking.
Cooking with wine is an age-old technique to add depth, acidity, and richness to recipes. The heat used in cooking causes the alcohol to evaporate, leaving behind the wine's essence to infuse your dishes with complex flavors. This makes "bad" wine an unexpected hero in the kitchen.
How to Use "Bad" Wine in Cooking
Sauces and Gravies: Add a splash of wine to deglaze the pan after sautéing meats or vegetables. The wine will help lift the caramelized bits from the bottom of the pan, incorporating them into a flavorful sauce or gravy.
Marinades: Wine's acidity makes it perfect for tenderizing meats and adding flavor in marinades. Combine it with herbs, garlic, and oil to marinate your meat a few hours before cooking.
Braising Liquid: Use wine as part of the braising liquid for meats and vegetables. It adds a rich, nuanced base that water alone cannot provide.
Soups and Stews: A cup of wine can greatly enhance the flavor profile of soups and stews. It adds a layer of complexity and enriches the broth, making even the simplest recipes taste gourmet.
Tips for Success
Balance: Be mindful of the wine's flavor profile; a very sweet wine might not suit all dishes, whereas a more robust, slightly off red wine could be perfect for hearty stews.
Reduction: If concerned about the "off" taste, reduce the wine separately before adding it to your dish. This concentrates its flavors and can help mellow out any unpleasant notes.
Experimentation: Start with small amounts and taste as you go. The goal is to enhance, not overpower, your dish with the wine.
POTATO Saver

-
Storing potatoes in a dark, cool place is a time-tested method to ensure they last for months, maintaining their freshness, texture, and nutritional value. This practice, deeply rooted in agricultural wisdom, leverages simple principles to prevent spoilage and extend the shelf life of these versatile tubers.
When potatoes are exposed to light, whether it's natural or artificial, they begin to produce chlorophyll, which leads to the development of a green tint on their skin. This is a visible sign of the presence of solanine, a natural toxin that can cause gastrointestinal distress if ingested in large quantities. Storing potatoes in the dark prevents this green discoloration and the accumulation of solanine.
Temperature: The ideal storage temperature for potatoes is around 45-50°F (7-10°C). This range is cool enough to slow down the enzymatic processes that cause spoilage and decay but not so cold that it converts the potato's starch into sugar. This conversion not only affects the flavor, making the potatoes taste sweeter, but also affects texture and cooking quality, especially when frying.
Best Practices for Storing Potatoes
Choose the Right Place: A basement, cellar, or even a cool, dark cabinet away from appliances that generate heat can be ideal. Ensure the area is well-ventilated to prevent moisture accumulation, which can lead to mold growth and rot.
Proper Ventilation: Store potatoes in a breathable container, such as a burlap sack, a cardboard box, or a mesh bag. This allows air circulation, reducing moisture build-up and preventing the growth of mold and bacteria.
Separate from Other Produce: Ethylene gas, produced by fruits like apples and bananas, can accelerate sprouting in potatoes. Keep them separate to extend their shelf life.
Inspect Regularly: Check on your stored potatoes periodically and remove any that are soft, shriveled, or sprouting. This helps prevent the spread of rot or disease to the healthy potatoes.
Avoid Washing Before Storage: Do not wash potatoes before storing them. The additional moisture can hasten spoilage. Instead, brush off any soil and let them dry if they are damp.
By following these simple guidelines, you can store potatoes in a dark, cool place to ensure they last for months. This not only helps in reducing food waste but also ensures that you have a steady supply of this staple ingredient, ready for your next culinary adventure. Whether you're making a comforting soup in the winter or a fresh potato salad in the summer, properly stored potatoes can be the foundation of countless nutritious and delicious meals.
Prepping Before You Cook: The Secret to Stress-Free Meals
-
Are you tired of the last-minute scramble in the kitchen when you're trying to put together a meal? Prepping before you cook is the key to creating stress-free and efficient cooking experiences. Whether you're a seasoned chef or a novice in the kitchen, these tips will help you save time, reduce stress, and make the cooking process a breeze.
The French term "mise en place" means "everything in its place," and it's a crucial concept in cooking. Before you start cooking, gather all your ingredients, tools, and equipment. Chop, measure, and prepare everything you'll need for your recipe. This ensures that you won't have to stop and search for ingredients or utensils while you're in the middle of cooking.
One of the most time-consuming aspects of cooking is chopping vegetables and measuring ingredients. Do this in advance, and you'll be amazed at how much smoother your cooking process becomes. Store pre-chopped veggies in airtight containers or zip-top bags until you're ready to use them.
Before you start cooking, clean and organize your kitchen workspace. Have a garbage bin and a bowl for compost or scraps readily available. Clear countertops of clutter, so you have plenty of room to work efficiently.
By prepping before you cook, you'll not only streamline your cooking process but also gain more confidence in the kitchen. You'll find that you can enjoy the creative and satisfying aspects of cooking without the stress and chaos that can come with unpreparedness. Happy cooking!
Rescue your Burnt items

-
Have you ever eagerly awaited a delicious homemade pizza, a sweet dessert, or a slice of perfectly toasted bread, only to find it burnt? It happens to the best of us. But before you consider tossing your charred meal, there's a simple, yet effective hack to rescue it: grating off the burnt parts. Yep, it’s that straightforward!
When food gets burnt, the charred layer can impart an unpleasant bitter taste. However, often only the surface is affected, and the rest of the dish is still perfectly good. By grating away the burnt parts, you can salvage the majority of your meal, saving both your food and your effort.
This simple grating trick can turn a kitchen disaster into a still-enjoyable meal. Remember, it’s not just about the food, but the love and effort you put into making it. So next time you accidentally burn your pizza, dessert, or toast, don't despair - just grate away the burnt bits and enjoy!
How to save herbs properly

-
Fresh herbs are a delight, and critical for adding vibrant flavors (and aromas) to a variety of dishes. However, they can be delicate and have a short shelf life, leading to potential waste and unnecessary expense. But fear not, as there is a simple and effective method to prolong their freshness and ensure you get the most out of your purchase.
When you bring fresh herbs home, the first step is to untie them and give them a gentle wash. This helps to remove any dirt that may be lingering on the leaves. Once they are clean, shake off any excess water and pat them dry with a paper towel. The key to preserving their freshness lies in how you store them.
Find a container that is large enough to hold the herbs without squashing them. Place a paper towel at the bottom of the container; this will absorb any excess moisture, preventing the herbs from becoming slimy. Lay the herbs on top of the paper towel in a single layer, and then cover them with another paper towel. Seal the container and place it in the refrigerator. The paper towels will help to maintain the right level of humidity, keeping the herbs fresh and crisp for a longer period of time.
This method works well for a variety of herbs, including parsley, cilantro, dill, and mint. For herbs like basil, which are sensitive to cold, you can follow the same steps but store the container at room temperature instead of in the refrigerator.
By taking a few extra minutes to properly store your fresh herbs, you can extend their shelf life, reduce waste, and save money. Plus, you’ll always have fresh herbs on hand to enhance your meals, making every dish a flavorful masterpiece. So, the next time you find yourself with a bunch of fresh herbs, remember this simple storage hack and enjoy the benefits of fresher, longer-lasting flavors in your cooking.
No More Wasting Food Scraps

-
While meal prepping, do yourself a favor: Those onion ends, carrot peels, celery leaves, and even the bones from last night's roast chicken are far from waste; they're the foundation for rich and flavorful stocks. Instead of discarding these remnants, store them in a freezer-safe bag or container. Over time, you'll accumulate a diverse mix of scraps that can be transformed into a hearty base for soups, stews, and other dishes (just keep adding to the same freezer bag). This practice not only reduces kitchen waste but also offers a cost-effective alternative to store-bought broths, ensuring you have a homemade, preservative-free option on hand. Add the scraps to water, salt/pepper, and any herbs you have on hand for an easy, healthy stock.
Vegetable stock, with its aromatic blend of herbs and veggies, is a staple in many dishes. But don't stop there. Chicken stock, derived from leftover bones and vegetable scraps, imparts a deeper, meaty flavor ideal for heartier meals. For those summer months when corn is abundant, even the cobs have a purpose. Corn stock, made from the stripped cobs, captures the essence of summer, providing a sweet base perfect for chowders and risottos.
In the age of sustainability and minimizing waste, one of the most effective ways to maximize your kitchen's efficiency is by saving and freezing food scraps for stocks. By embracing this method, you're not just saving money and reducing waste; you're also elevating your culinary creations with rich, homemade stocks tailored to your taste.
Plastic Wrappin’ Done Right

-
We've all been there: trying to cover a dish with plastic wrap, only to have it cling frustratingly to itself, turning into a tangled mess. But what if there was a simple solution to this common kitchen dilemma? Enter the freezer hack, as popularized by (of course) a TikTok video. By storing your roll of plastic wrap in the freezer, you can significantly reduce its clingy tendencies. The cold temperature alters the wrap's static properties, making it much more manageable and less prone to sticking to itself. Next time you're prepping meals or storing leftovers, give this hack a try. Not only will you save time and reduce waste, but you'll also bid farewell to the age-old frustration of wrangling with clingy plastic wrap.
Even better? Think about long term, reusable solutions like silicone baggies or wrap (yes, we do love a Stasher bag and Ikea has solutions) or using products like beeswax wrap.
Using your microwave correctly

-
Ever take a bite and the outer layer of your food is scalding hot while the inner portion is lukewarm (or even cold)? Microwaves work by emitting electromagnetic waves that excite the water molecules in food, generating heat through this agitation. When set to its highest power, the microwave releases these waves at full intensity, rapidly heating the food. While this might seem efficient, it can lead to uneven heating.
To ensure even heating and maintain the quality of your food, there are a few key steps to follow. First, always use microwave-safe containers, avoiding materials like metal which can cause sparks and plastic containers that can leach microplastics. Spread the food out evenly in the container, and if possible, create a small well in the center. This allows the microwaves to penetrate the food from all angles, ensuring uniform reheating. Additionally, covering the container with a wet paper towel helps retain moisture and prevent the food from drying out.
The most important step, however, is to reduce the power setting (the default is set to max power) when you go to warm up your food. Using the medium power setting on your microwave allows the microwave to emit waves in a more controlled and gradual manner. This slower, more consistent heating process gives the heat ample time to penetrate deeper into the food, ensuring a more uniform temperature throughout. Moreover, it reduces the risk of overcooking or drying out certain foods. For dishes that are sensitive to rapid heat changes, like creamy sauces or delicate pastries, the medium setting can help maintain their texture and flavor. In essence, while the high power setting might save a minute or two, opting for medium power often results in a tastier, more evenly heated meal, making the extra wait well worth it.
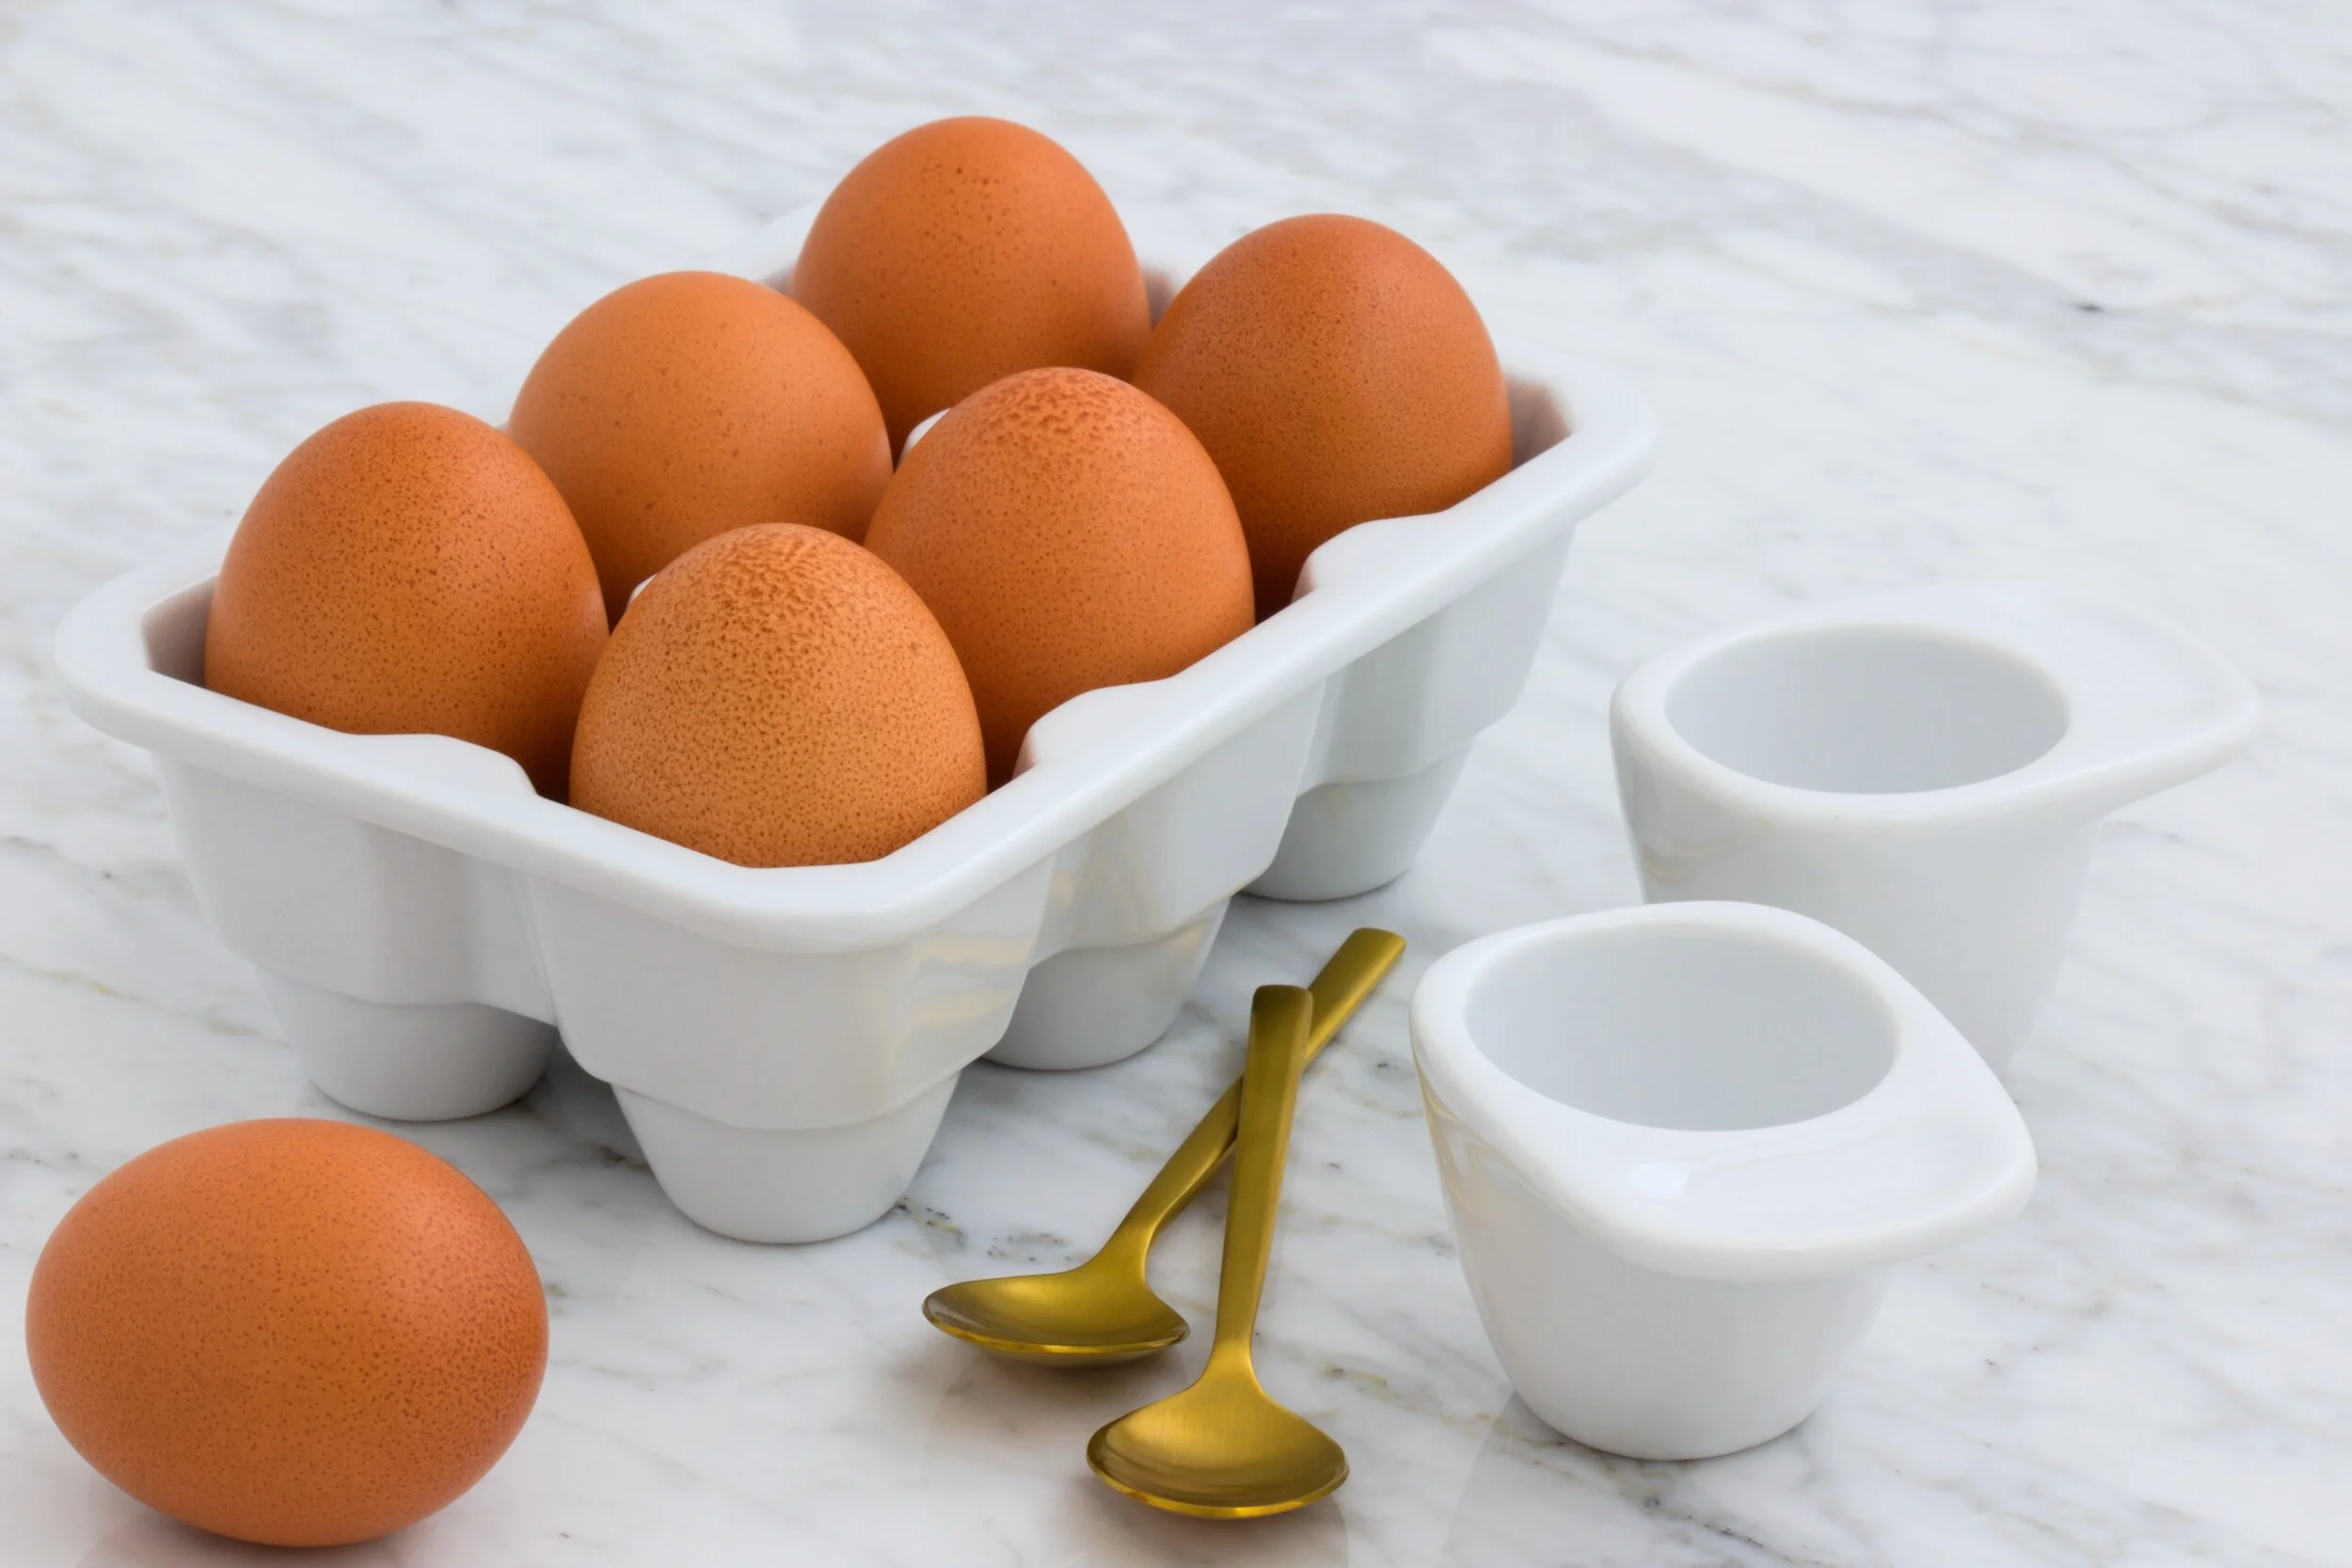
Peeling Eggs
-
Eggs are often hailed as nature's perfect food, and for good reason. Packed with high-quality protein, essential vitamins, and minerals, they offer a myriad of health benefits. Consuming eggs can aid in muscle strength, brain health, and weight management. They are rich in choline, which is crucial for brain function and development. Additionally, the antioxidants found in eggs, such as lutein and zeaxanthin, play a role in maintaining eye health and reducing the risk of age-related macular degeneration. They have a ton of other essential vitamins and minerals, including vitamins A, E, D, B5, B12, as well as iron, riboflavin, folate, iodine, and phosphorus. Moreover, eggs are a versatile ingredient that can be incorporated into various dishes, making it easy to reap their benefits daily.
Boiling eggs might seem like a simple task, but peeling them can often be a frustrating experience. However, there's a nifty trick to ensure the shell comes off effortlessly every time: adding baking soda to the boiling water. By adding just 1/2 teaspoon of baking soda when boiling the eggs, you increase the alkalinity of the water. This slight change in pH loosens the bond between the egg white and the shell, making the peeling process a breeze. Once boiled, transfer the eggs to an ice bath to cool them down quickly. After a few minutes, you'll find that the shells practically slide off, leaving you with perfectly peeled eggs ready for consumption or further culinary adventures.
Recently, another trend has taken TikTok by storm, showcasing a unique method of cracking boiled eggs using a spoon. As seen in this TikTok, continually tap the egg lightly with the back of a spoon until you hear the sound of the crack change, separating the egg white from the shell. Voilà!